Bikepacking Eastern Germany – What’s it like?
Bikepacking in Eastern Germany surprised me. As a person, who grew up in a typical unimpressive village in the countryside and later moved to the big city, I genuinely did not know much about the beauty of the regions surrounding me before this trip. You can expect to ride through many small german villages surrounded by farmland and forests stretching endlessly to the horizon. Beautiful sunsets included. Every couple of kilometers there will be a clear and refreshing lake you can swim in. Don’t worry, water quality is excellent most of the time, so it became part of my daily routine to just jump in whenever I came across one.
In my opinion, this route has the perfect itinerary to get started with bikepacking. If you do not have the best equipment the route is forgiving and offers plenty of opportunities to resupply and get help as you are never too far from civilization. The terrain itself ranges from flat to hilly with bike paths or fairly empty countryside roads offering optimal surfaces throughout basically the entire route. All in all, perfect and worry-free conditions, if you are a beginner. For me, it was the first real bikepacking trip, though I have already done some multi-day hiking trips, such as the Pekoe Trail and the Fisherman’s trail
The route from Dresden to the Baltic Coast is not that well known compared to for example the Munich to Lake Garda or the Danube route but in my opinion, not having a clear idea of what is to come along the route gives you the joy of exploring new regions more openly and easing off the pressure to „see all the highlights“. Especially this route surprised me with it’s natural beauty, as I did not expect much from it beforehand.
Equipment – What should you bring with you?
In terms of equipment you should be prepared for warm and cold temperatures, as german summer weather can be unpredictable. It’s best to bring a basic three-season camping gear with you. This includes a tent, a sleeping pad or air mattress, aswell as a sleeping bag. Although it is not necessarily needed, I would also recommend you to bring an inflatable pillow for comfort.
Before you run into the next outdoor store consider this: if you have never done such a trip before and you are unsure whether this is something you would like to do again in the future, do not invest loads of money in the best equipment the store has to offer. Just bring whatever you already have or ask friends and family if they have any equipment you might be able to borrow. Afterall, this is supposed to be a budget-friendly way of travelling.
I’d recommend buying new gear only if the equipment you have is too bulky or too heavy to take with you, as space on the bike is limited. Try out how to fit everything beforehand and look into options on how to secure all the things you want to bring with you, so it does not fall off mid-ride.
In my case, I had a good air matress, but my tent and sleeping bag where to bulky, therefore I bought the MT900 trekking tent together with the MT500 sleeping bag from Decathlon. I am very happy with this investment, as both are very light and worked perfectly for me during the 6 days without breaking the bank. In addition to the camping equipment, here is a checklist of what you will need to bring with you for this bikepacking itinerary:
Clothing
- min. 2 pairs of underwear
- 3 pairs of sports socks
- thermal layers
- rain-proof jacket
- long rain-proof pants
- 2-3 breathable T-shirts to wear while riding
- biking shorts (important)
- swim wear
- short pants (recommended, when it’s very warm)
- slide sandals
- 1 pair of breathable and water repellent sneakers
- helmet
- quick-dry towel
- optional: sunglasses
- optional: cycling gloves
Hygiene
- toothbrush
- tooth paste
- neutral block of soap for showering, washing dishes and clothes
- sunscreen for face and body
- Vaseline
- deodorant
- mosquito spray (important)
- optional: a small block of shampoo
- toilet paper
Tech
- fast-charging block + at least 2 cables
- Powerbank
- Bike lamps
- Head lamp
- optional: camera
Tools
- multi-tool (knife, spoon, fork, scissors, …)
- bike lock
- bike pump
- portable stove + extra fuel
- pot for cooking + eating
- trash bags
- optional: paracord
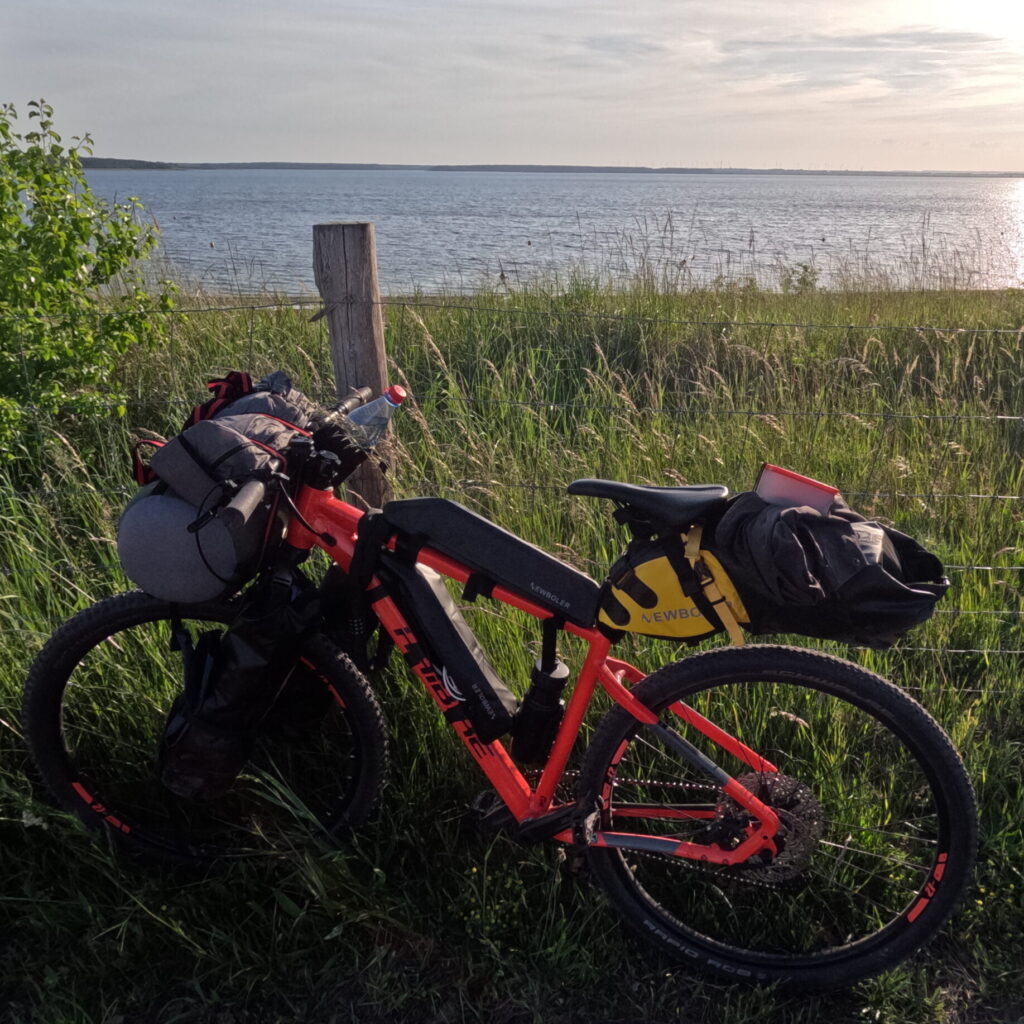
The choice of cycling bags made for bikepacking is endless. It also heavily depends on how much gear you need. The checklist above is the basic equipment, but if you want to take more with you, plan to bring accordingly larger storage volumes. Also think about water. Take at least 2,5 liters with you. This is often overlooked, but in the end you also need a way to carry those bottles.
I brought all the things listed above with me and had 26l of storage on my bike. About half of that was taken up by my very bulky air mattress, while tent and sleeping bag where secured with 2 cargo straps on the handebar. If you invest into new bags, my main tip would be to buy completely water-proof gear. In case you get into a sudden heavy downpour, your gear remains save and dry, which is essential, when you cannot dry things effectively for days on end.
Camping for free – What options are there?
Of course you can pay for official campsites to sleep on during the trip. They are safe and offer running water and electricity. The downside is that they can get very expensive very fast in Germany. Prepare to spend between 20€ and 30€ per night for 1 person + 1 tent. If in reach, polish campsites are cheaper but they are quite a detour to get to. To save some money I will explain all the option out there to sleep for free during the trip, ranging from wild-camping to more legal options.
Wild Camping
Camping in the wild in Germany is officially illegal. If caught, be prepared for a hefty fine. Although you might read online that the state of Brandenburg (that this itinerary goes through) allows it for 1 night, but there are so many exceptions written into the law, that in practice, I did not find a single spot where I could legally pitch my tent when researching along the route. In any case, wild camping is probably the most adventurous option here and requires some knowledge about how to do it.
Before you run into the next forest to camp for free, you first have to know about some basic rules though. First of all, leave no trace. Take all your trash with you and leave nothing but the markings of your tent in the grass behind. Furthermore, to remain undetected, pitch your tent late in the evening and be on your way early in the morning. I’d recommend 20:00 to 7:00. During this time not a lot of people will be out, who might encounter your camp.
If somebody does see you, remain open and cordial with them. Explain them what you are doing and that you are no harm and hope for the best. If somebody asks you to leave do not argue. Be respectful, pack up and look for a different spot. In addition, keep everything organized and quiet, so nobody suspects somebody to be there in the first place. At best look for a site, that is at least 100m from any path and sheltered from the eyes of passers-by. And last but not least, do not camp in protected areas. If somebody sees you there, you will definitely be fined.
Official Bivouac Sites
Luckily, there are many official Bivouac sites along the route, most of which named „Wasserwanderrastplatz“, intended to be used by people doing multi-day kayak trips in the area. They are basically a small grassy area with a wooden bench and table and a portable toilet. Most of them have access to a body of water, making them perfect for a quick swim after a long day of cycling. Be respectful of these special places though and do not leave any trash behind. Remember: There are people from the surrounding community, that care for these places with no compensation in return!
In this itinerary, I used these whenever possible, because not only are they free, but they also have the most amazing locations. Use this website to get an overview of what locations are available for free to the public. The only problem I see with them is their limited availabilty in some regions, as they mainly exist around kayaking routes, where an overarching effort was made to implement a small network of them.
1NiteTent
This website tries to bring together people, who need a place to pitch their tent for the night and people who have a lawn, garden or field in their posession and are open to hosting. Some even offer water, electricity or even fruits from their garden. An easy and fun way to camp safely and comfortably with the added opportunity to meet local people from the area.
Warm showers
This is a website specially designed for the bikepacking community. The idea is that hosts will welcome bikepackers in their home, providing them with a bed and a bathroom. If you are not a fan of camping in a tent or if the weather is really not on your side, I can recommend you this option. You have to create an account first though and if you want to use the app it costs a small fee, but the browser version is free.
A 6 day itinerary
Day 1
Length: 90km
Duration: 5 hours 19 min
Altitude change: 350m
Sights along the way:
- Dresden Old Town
- Moritzburg Castle
- Zschorna Lakes
- Senftenberg Lakes
Link to tour:
On the first day of the trip, I left Dresden, my home town, heading North. Dresden is a beautiful city and serves as an ideal starting point for this tour, as it is well conected by train and near the southern border with the Czech Republic. If you have enough time, take one day to explore the city before the start of the trip. From Dresden, head north through Radeburg and the Zschorna Lakes to Ortrand before heading West through Hosena towards the Geierswalsder See. This lake is part of the broader Senftenberg Lake Area, which was created following the end of the open pit cole mining in the region.
If you have the energy take a small detour to Moritzburg. This impressive castle is the site of the famous film „Drei Haselnüsse für Aschenbrödel“, which, under different names, is well-known across Europe. After reaching Geierswalde enjoy a meal at the Lighthouse Restaurant and swim in the clear water of the lake. In the area surrounding the lakes, there are sadly no official free campsites though. I camped in the wild just north of the village Lieske. There are also many paid campsites right by the lakes to choose from though, which looked pretty good, when I passed by.
Day 2
Length: 110km
Duration: 6 hours 30 min
Altitude change: 200m
Sights along the way:
- Spreewald
- Briesensee
- Schwielochsee
Link to tour:
On the second day, head north past Welzow and Drebkau into the highlight of the day: The Spreewald. This area is a very famous day-trip destination in Germany, well known for kayaking and pickled cucumbers. The name translates to „Forest of the river Spree“.
In said forest, the Spree diverges into many diffferent branches connected by various man-made canals over the years. The route takes you through the entire Spreewald through Lübbenau and Lübben. Enjoy a lunch on the way at a restaurant besides one of the many canals. When the weather is warm and sunny, expect crowds of people. You will not be alone here. Internationally though, the Spreewald is pretty unknown, so it will feel like a true hidden gem if you are not from Germany.
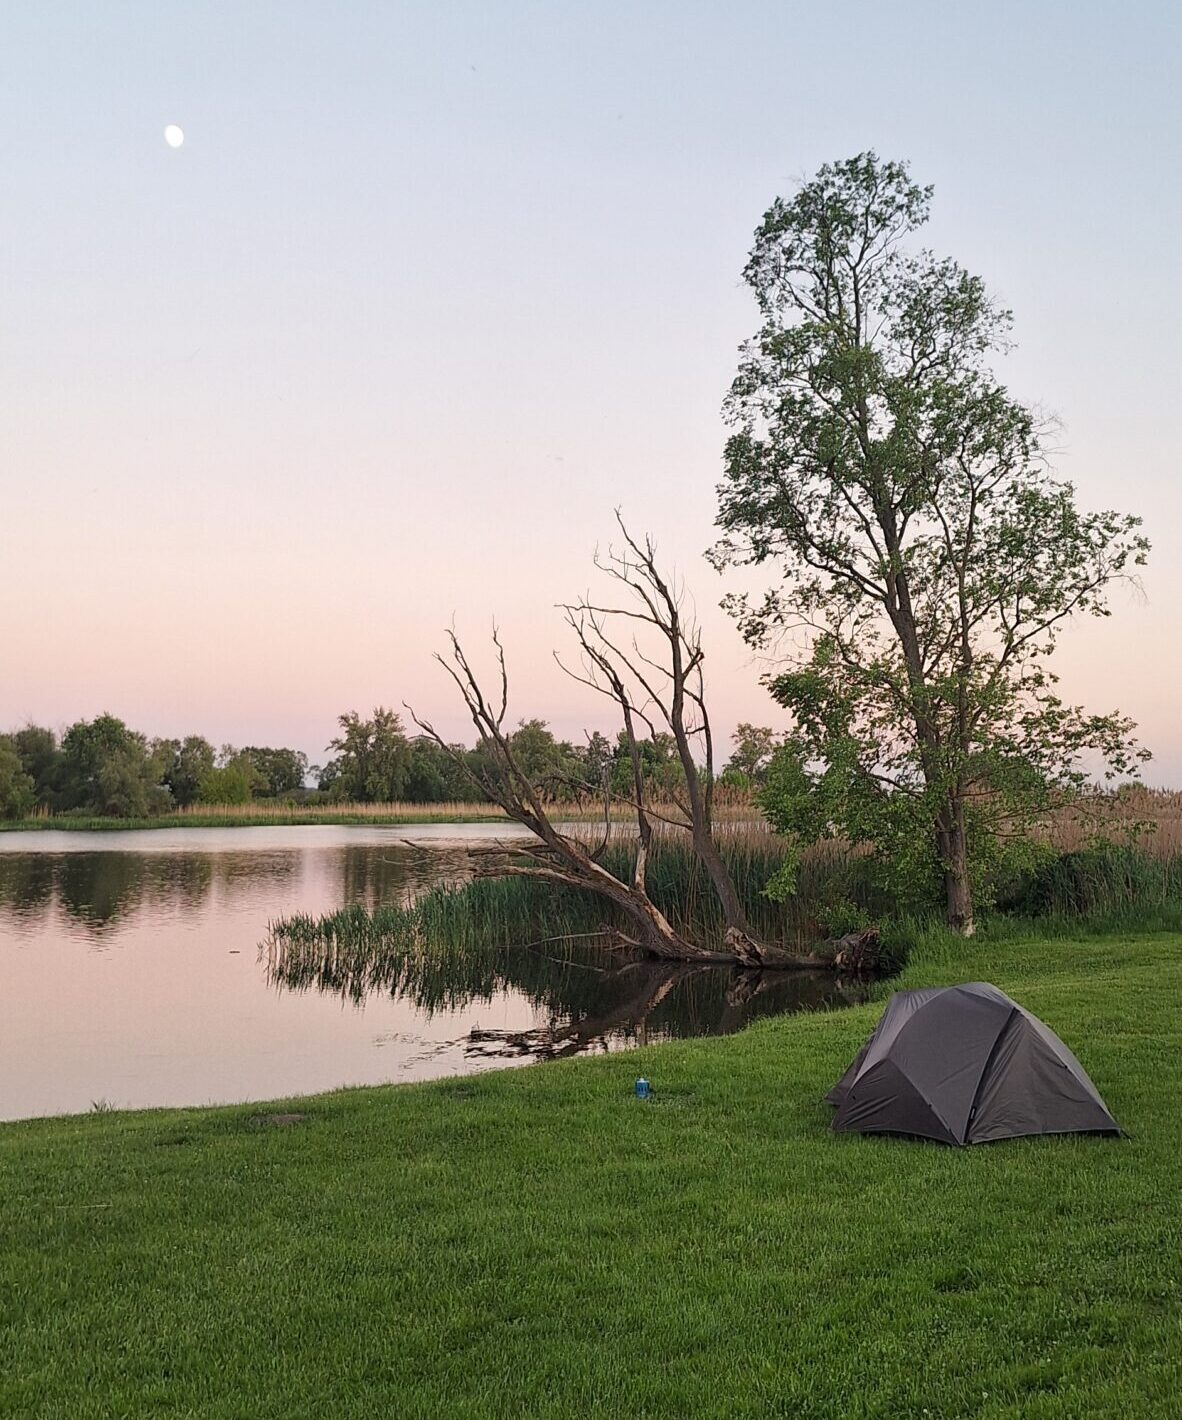
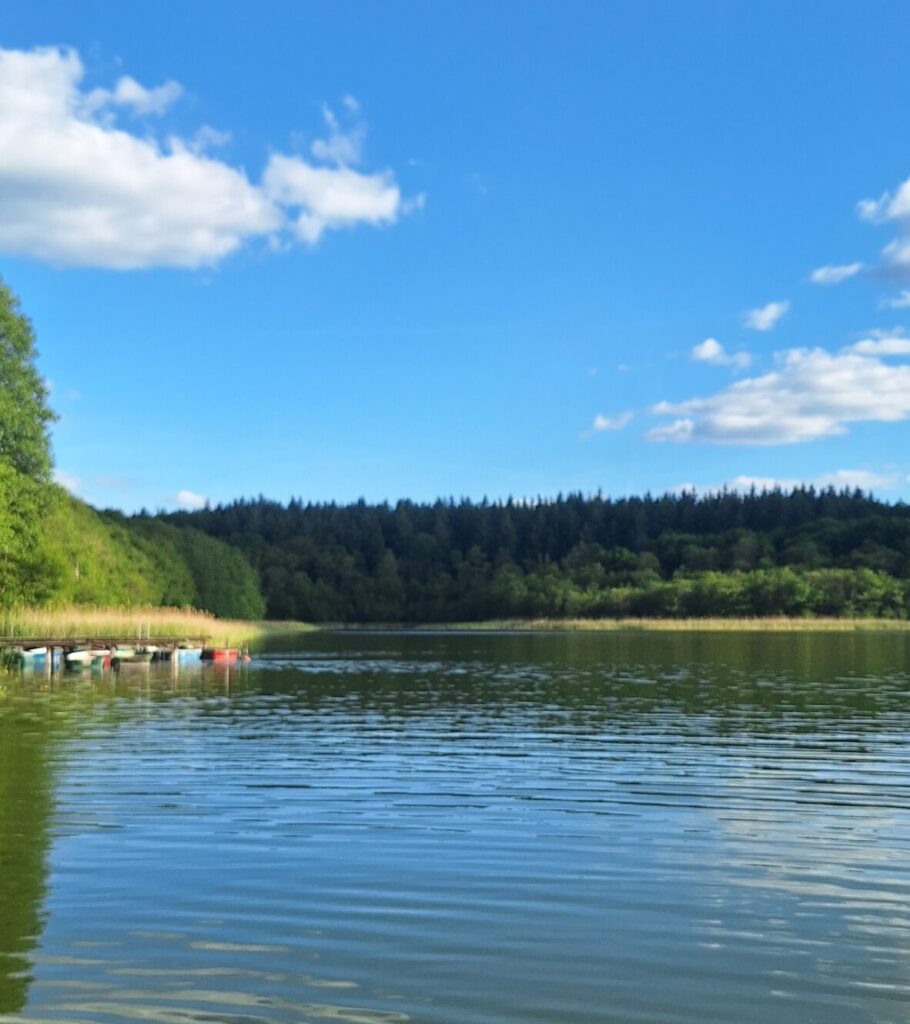
After Lübben, head East towards the Briesensee. This lake with a sandy beach is situated in the middle of a forest in the countryside, perfect for a small swimming break. This was actually one of my favorite lakes along the way, as the clear water and shaded beach makes for a perfect relaxed afternoon. Having enjoyed the beach, I headed further North-East towards the Schwielochsee before camping at the Wasserwanderrastplatz Trebatsch (free), situated on the banks of the Spree.
Day 3
Length: 105km
Duration: 6 hours 35 min
Altitude change: 420m
Sights along the way:
- Scharmützelsee
- Fürstenwalde
- Märkische Schweiz Nature Park
- Oderbruch
Link to tour:
Start the day with a hot coffee from the bakery near the campsite and start heading North. After around 30 kilometers you will reach the beautiful Scharmützelsee, a lake with clear water and a picturesque scenery. Many resorts and lakeside homes are situated along its shore. Many Berliners have their second home here to escape the city in the summer.
Pass Fürstenwalde and Müncheberg, before arriving in Buckow, a small picturesque town in a hilly mountain range with the same name. Enjoy your afternoon near the lake, for which sadly there was no officiall, free spot to swim, only a paid beach. Finish the day off by riding into the „Oderbruch“, where you can set up camp at the Wasserwanderrastplatz Neugaul (free), which sits right at the bank of the Old Oder River.
The Oderbruch is an interesting geographical phenomenon. It was carved out by Ice Age Glaciers and further transformed by the Oder River into a floodplain. The area is extremely flat and nearing sea level, so the river flows extremely slow and splits into many different branches on it’s way through the area. I was truly surprised by this region of Germany, as I had never heard of it before. The landscape is beautiful and life felt very calm, far away from the hustle and bustle of the cities.
Day 4
Length: 87km
Duration: 5 hours 1 min
Altitude change: 170m
Sights along the way:
- Oderbruch
- Unteres Odertal National Park
Link to tour:
Today’s route leads you along the Oder-Neiße Cycling Route, where you can ride almost exclusively on dedicated bike paths. The highlight of the day is the Lower Oder National Park, which is one of just 16 national parks in Germany and preserves the traditional floodplain landscape, that was once defining all big rivers in the country. Here, the low population density and historically low importance of the river for shipping spared the Oder’s banks from being transformed into farmland, towns and ports, so it feels like a look into the past when passing by these beautiful landscapes.
If you do not have any snacks or supplies for the way, take the detour through Bad Freienwalde first. There are supermarkets to stock up on supplies. This is the last oppurtinity to buy something until you reach Schwedt around 50 kilometers away. Of course, you can still go to a local restaurant along the way but a meal there costs a bit more than in the supermarket of course. In Schwedt, I stumbled across the „Flussbadestelle“, a cared for spot with access to the „Hohensaaten-Friedrichsthaler Wasserstraße“, a man-made canal for ships heading from Berlin to Stettin. It is free and very well maintained, definitely the best spot in Schwedt to take a break and go for a swim.
After Schwedt, head North towards Gartz, one of the last villages before you reach the Polish border. Here you can find the Wasserwanderrastplatz Gartz (free), where you can camp right next to the western branch of the Oder. The place is extremely well cared for. They even have a dedicated place to light up a campfire.
Day 5
Length: 106km
Duration: 6 hours 44 min
Altitude change: 510m
Sights along the way:
- Stettin
- Brohmer Berge
Link to tour:
Start your day heading North. If you want to cross into Poland (that’s what I did) instead of following the Oder-Neiße cycling path head towards Kolbaskowo. Additionally if you have the time take the detour towards Stettin and visit the city. I skipped it on this tour but it is on my bucket list to go there one day.
I instead headed West back over the border and followed a cycling path along an old narrow gauge railway until Krakow. In Krakow turn right towards Löcknitz and go onwards from there towards Pasewalk. I followed the B104 road for most of the distance but I would advise you to instead look for the cycling signs leading to Pasewalk. Although that route is slightly longer, it is much more beautiful leading through several typical small north german villages.
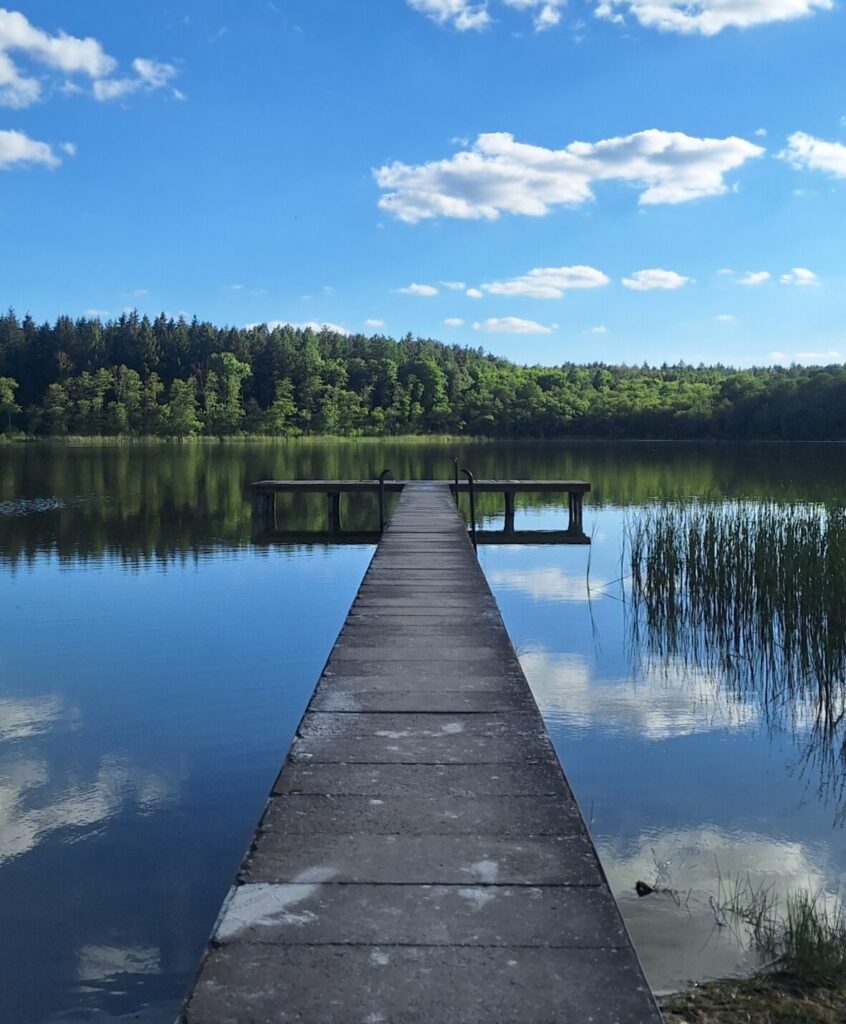
Stock up on some supplies in Pasewalk, as today’s campsite is situated far into rural Pommerania, where no shops are to be found for miles, as it is one of the least densely inhabited areas in all of Germany. Head through the beautiful (and completely unknown) Brohmer Berge and stop at the small Schmiedegrund lake, which was my favorite place to swim overall on this trip.
The lake is very small surrounded by forest on all sides. The grass beach with a small jetty is ideal to head into the clear and refreshing water after a long day of cycling. If you arrive in the evening you will probably see some fisherman and a couple camping vans near the entrance, but generally there seem to be very few people here.
Today’s camp spot is situated in the nearby village of Heinrichswalde near the Galenbeck lake with a plattform to look over it nearby. It is not an official campsite but if you call the owner he will gladly host you at no extra cost. There even was another bikepacker there when I visited. He also offered me water and electricity, which was very much welcomed after the lasts spots never had any of that.
Day 6
Length: 106km
Duration: 6 hours 30 min
Altitude change: 300m
Sights along the way:
- Anklam
- Wolgast
- Usedom
Link to tour:
Dresden – Greifswald Tag 6 | Fahrradtour | Komoot
Note:
My goal of this trip was Greifswald, but for anyone, who has never been to Usedom, I would recommend going there instead!
On the last day of the trip the goal is to reach Usedom, an island along the german baltic coast, which is famous for its beaches and is a hotspot for beach tourism in summer. Start by heading north into Anklam, which you will reach after around 35 kilometers. This town is the first opportunity to find something to eat again.
I forgot to buy breakfast the day before, so I was truly hungry and had to ride until Anklam on an empty stomach. From here on you will start to encounter more tourists heading on bike tours through the coastal hinterland, signalling that you are getting close to your destination. Follow the signs towards Wolgast and head over the bridge onto Usedom.
From here on, head straight towards the beautiful beaches near Zinnowitz, where you can relax the afternoon away knowing you have just ridden over 600 kilometers on your bike to get to this point. If you want, you can end the trip here, but for the true Usedom experience continue just a bit further towards Heringsdorf through the coastal forests.
The only problem on Usedom is, that it can get very touristic and as a result there are no free spots to camp for the last night. I cannot recommend camping in the wild here, as the acceptance of the practice is probably much lower seing that you are in the middle of an island that drowns in tourists in the summer months. The cheapest option here is probably to book a campside in Swinemünde, a town on the polish side of the island, where prices are a lot lower than on the german side.
Cost breakdown
Not counting the equipment, that I used on this trip, my only expenditure was food, which I mostly bought at supermarkets. I spent roughly 88€ for 6 days of bikepacking. In addition to that, I also paid the 7,50€ one-way bike ticket to get my bike back to Dresden in the end. If you do not have a Germany train ticket, a one way ticket from Usedom to Dresdem costs from 30€ onwards depending on the time of booking and the type of train. Tickets can be bought via the DB App.